(twitterfeed 目前不支援hellotxt)
步驟1
首先我們需要取得Google+的個人ID,登入Google+的個人資料頁面,在網址列裡可以看到一排數字,將數字記起來。

步驟2
再來就是將Google+的個人ID轉換成RSS Feed,到這裡http://gplusrss.com/ 去取得一個Google+的個人公開訊息RSS Feed。
如果只要跟Facebook及Twitter同步,可以直接跳至步驟5
步驟3:
登入http://hellotxt.com/,可以直接facebook或twitter的帳號登入

進入右上角的「Manage Networks」
想要同步至那些網站就加入(Plurk目前有問題,無法加入)

步驟4:
連到這個網址http://hellotxt.com/dashboard/applications/TwitterFeed
按下TwitterFeed的「Enable this application」

這時候會得到TwitterFeed的user key ,把黃色的字串記起來

步驟5:
再來登入http://twitterfeed.com/
可以使用OPEN ID登入,也就是不用註冊,選擇你常用的服務帳號就可以登入

步驟6:
在TwitterFeed裡新建立一個Feed,我取名PlusFeed,把步驟2的Feed URL填入

繼續下一步,選擇Hellotxt

如果只為了同步Facebook跟Twitter建議由這裡直接加入

步驟7:
繼續下一步,把步驟4的黃色字串填入,到這裡差不多要完成了

步驟8:
回到TwitterFeed的主頁,編輯新建的這個PlusFeed

選擇「Advanced Settings」

記得將1.Post Content改為「title only」或「description only」才不會有重覆的訊息,但是如果要在fb顯示縮圖就是選「title & description 」,2.另外如果發文量比較大的人,可以將每次更新的則數調成5則,3.post link 可以選擇不用勾選,才不會太多有重覆的連結。

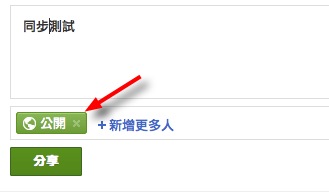
以上完成,這時候登入Google+發一則公開的訊息測試看看,如果是發給某一社交圈的話就不會同步,另外如果不希望hellotxt自動縮址為http://htxt.it,可以在網址前加上「*」
[G+小技]方法一:將Google+的訊息同步到噗浪、臉書、Twitter等其它網站
步骤六的时候提示“Feedurl A feed needs to contain publish dates or GUIDs in order to work with twitterfeed, see http://twitterfeed.com/help#faq2_3”然后就无法进行了下去了,请问为何呢??
回覆刪除to zementary
回覆刪除你在步驟2取得的feed 可能有問題,貼在網址列測看看有沒有資料
我想請問一下...要怎麼轉RSS?
回覆刪除第二步驟一直不會用@@
to 徐伊
回覆刪除把個人資料中的數字貼在下面這個網址後面,整個就是RSS feed
http://plusfeed.appspot.com/
解決了^^!!
回覆刪除但是有一個地方沒出現耶!!
就是步驟六,選擇主動伺服沒出現那三個選項
to 徐伊
回覆刪除三個都有設才會出現三項,如果只設hellotxt就只會出現一個
谢谢,找到原因了,因为我没发过public的消息。都是extended..哈哈哈
回覆刪除都解決了^^a謝謝你!!
回覆刪除Rss用不好是因為我都沒有發訊息...
hellotxt 噗浪 的NICK 要打什麼才行
回覆刪除我打我登入的MAIL 他一直說錯誤資料
無法登入 設定同步
nick是暱稱不是帳號也不是email
回覆刪除